24 essential Gmail shortcuts to become a pro at managing emails

Table of contents
Emails. Love them or hate them, they’re an inevitable part of our day. Whether it’s work updates, newsletters, or client communications, it feels like our inboxes demand constant attention from us. And the truth is, we’re already spending a big chunk of our time managing emails.
But what if you could take back some of that time? Instead of clicking around endlessly, Gmail shortcuts let you breeze through your inbox, reply faster, and sort with ease – all with just a few taps on your keyboard.
Doesn’t that sound good? All you really need to do is learn once the shortcuts that you need and you’re done. You may not know it yet but the speed and efficiency with which you’ll manage your emails will be starkly different from what you do now.
You’ll spend less time on routine tasks and more time actually getting things done.
If this interests you, read on as I discuss the most important Gmail shortcuts you should know to become a master at managing your email operations. I should probably warn you though, you might pique the interest of your colleagues and they’ll want you to teach them your ways!
Table of Contents
- How to enable shortcuts in your Gmail account
- 24 most useful Gmail shortcuts you should learn
- How to create custom shortcuts on Gmail
- Go beyond Gmail shortcuts and transform your inbox into a collaborative workspace
How to enable shortcuts in your Gmail account
Before you can conquer your inbox like a pro, you’ll need to turn on Gmail’s keyboard shortcuts. These are different from any computer’s default shortcuts, and require manual activation in Gmail’s settings. Don’t be alarmed – it’s not hard at all. Here’s how you can do it:
- Open your Gmail account.
- Click on the gear icon in the top-right corner of the screen.
- Select See all settings from the dropdown menu.
- Scroll down until you see Keyboard shortcuts (hit Ctrl+F and type “key” to find it faster).
- Select Keyboard shortcuts on.
- Scroll to the bottom of the page and click Save Changes.
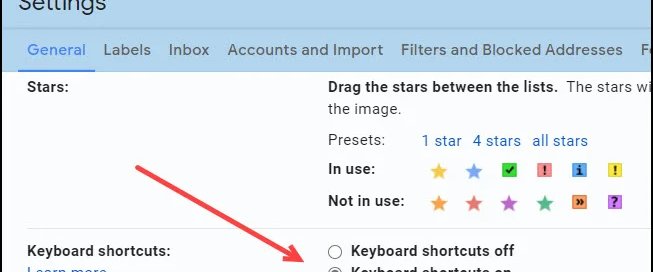
Now you’re all set. If you want to see the complete list of Gmail shortcuts available to you, you can simply press Shift + ? and you’ll be taken to a new tab with a Google article about all the Gmail keyboard shortcuts.
24 most useful Gmail shortcuts you should learn
Here’s a cheat sheet of the most useful Gmail shortcuts that you should learn. For those who use a Windows computer, it goes without saying: replace the ⌘ key with the control key. Now, let’s jump in.
Shortcuts for browsing your inbox more efficiently
These shortcuts will help you navigate your inbox with ease without even touching your mouse.
- Move to the next email by pressing J
- Move to the previous email by pressing K
- If you want to open the selected email, press return (or enter)
- To go back to your inbox, press U
- Press ] or [ to archive an email and see the next one
- To go to your email drafts, press G + D
- To go to your starred emails, press G + S
- To go to your sent emails, press G + T
- Jump to the search bar quickly by pressing /
- To delete an email, press #
- To mark an email as unread, press Shift + U
Shortcuts for composing emails and replies
This next set of shortcuts will help you streamline the way you compose emails and replies.
- To compose a new email, press C
- To send the email you’ve composed, press ⌘ + return
- If you want to reply to the selected email, press R
- Forward the selected email by pressing F
💡Pro tip: If you want to add CC and BCC recipients to an email you’re writing, you can do so instantly by pressing the Gmail shortcut Command + Shift + C for CC or Command + Shift + B for BCC.
Shortcuts for formatting the email the way you want it
As a long-time Gmail user, one of the biggest complaints I have is the effort it takes to format emails. You know, things like italicizing a certain section of an email or adding bullet points. It’s just too many clicks and there’s that annoying pop-up at the bottom. Well, none of that will happen if you use these extremely simple Gmail shortcuts for formatting your email content.
- To bold text, press ⌘ + B
- To italicize text, press ⌘ + I
- To underline text, press ⌘ + I
- To increase indentation, press ⌘ + [
- And to decrease indentation, press ⌘ + ]
- To add a numbered list, press ⌘ + Shift + 7
- To add a bulleted list, press ⌘ + Shift + 8
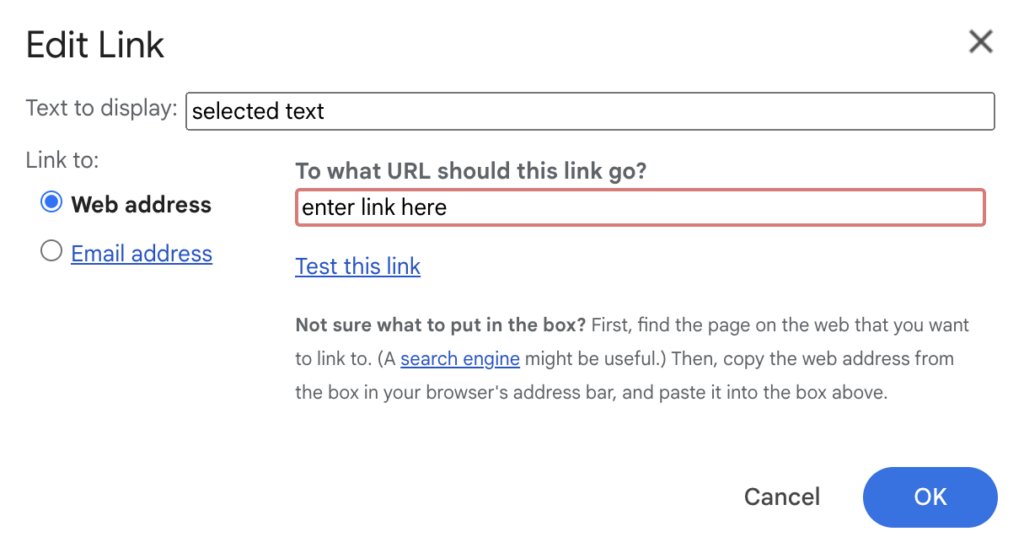
- To add a link, select the text you want to hyperlink and press ⌘ + K. Then just follow the instructions as seen below.
- And if you want to undo your latest action while composing an email, press ⌘ + Z
How to create custom shortcuts on Gmail
We’ve covered all the most important shortcuts in Gmail. But did you know you can change your Gmail shortcuts to custom keys to make things easier for yourself? Here’s how.
- Go to Gmail’s Settings menu and click the Advanced tab.
- Find Custom Keyboard Shortcuts and select Enable. Gmail will send you back to your inbox.
- Open the Settings menu again, and you’ll see a new tab called Keyboard Shortcuts.
- Click that tab to customize your shortcuts however you like.
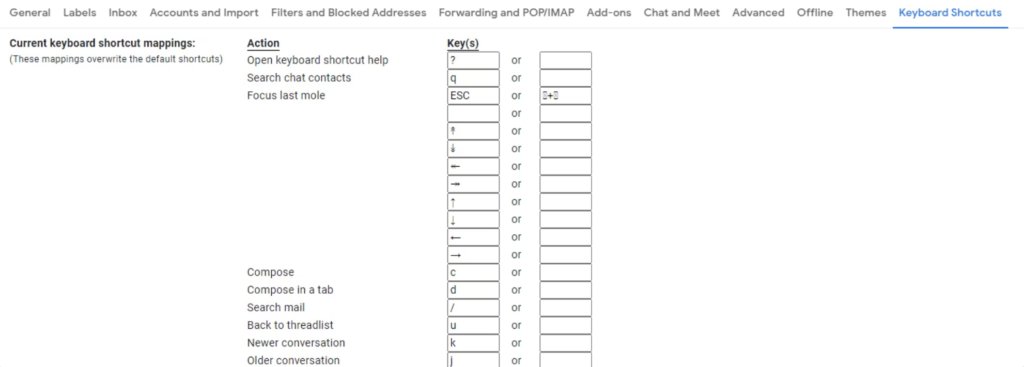
Once you’ve saved your changes, your custom shortcuts will be ready to use.
Go beyond Gmail shortcuts and transform your inbox into a collaborative workspace
Gmail shortcuts are a great way to save time sifting, sorting, and writing emails. But if you want to go even further and improve the efficiency with which you collaborate on and resolve email queries, then check out Hiver.
It has a number of features that makes life easy for you and your team.
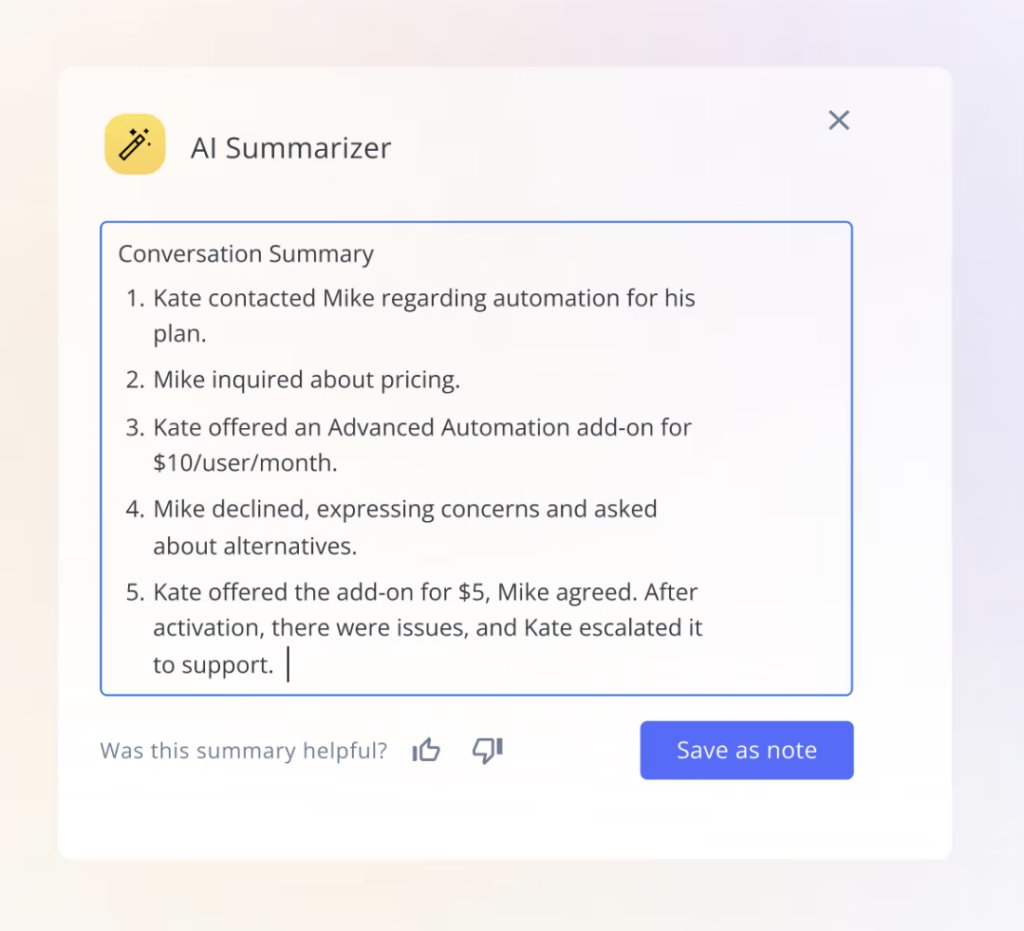
- AI Summarizer: Have a lengthy email thread that you need to go through before sending a response? Leverage the power of AI to condense email threads into concise notes using Hiver’s AI Summarizer.
- Automations: Take away the burden of grunt work that includes assigning or tagging emails manually. Instead, create simple ‘if-then’ rules to route emails to the right team member, evenly distribute incoming workload, and more.
- Email Notes and Tags: Add internal notes to emails, making it easier to provide context, instructions, or updates to team members. Tags can be used to categorize emails based on different criteria. For example, all incoming emails that have the word “payment” in the subject line can be auto-tagged as “invoice”
- Shared Drafts: Draft email responses and share them with your supervisors or managers for review, before sending them out to customers or other people you work with. This is a quick way to get approvals without much back and forth.
You can try Hiver for free.


