Understanding Outlook’s High Importance Feature: What It Means and How to Use It

Table of contents
Email is one of the most popular modes of communication in the workplace. Most organizations leverage email to communicate with their customers, employees, vendors, and all other stakeholders.
This also means that most employees deal with a full, and sometimes overflowing inbox. Sorting through these emails and prioritizing which ones to tackle first can be a challenging task. Without a proper system in place, it is easy to lose sight of important opportunities and deadlines, leading to increased stress and anxiety.
So, how do you tackle this?
Email clients like Outlook offer something called ‘High Importance’ emails for its users. It is a pretty nifty little feature that cuts through the noise and lets the email recipient know when a message is critical and needs urgent attention.
If you’re an Outlook user looking to leverage this feature, this blog is for you. We cover how you can use High Importance when sending your emails and outline a few best practices for when you use it.
Read on to know more.
Table of Contents
- What is the Outlook High Importance Feature?
- How Does the High Importance Feature Work?
- When Should You Use the High Importance Feature in Outlook?
- Best Practices for Using High Importance in Outlook
- Maximize the Impact of Your Emails With Outlook’s High Importance Feature
What is the Outlook High Importance Feature?
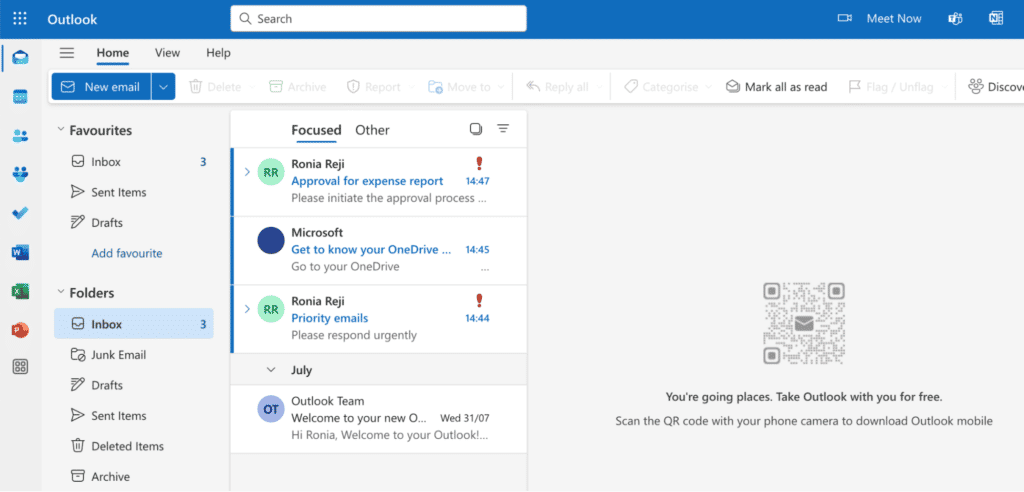
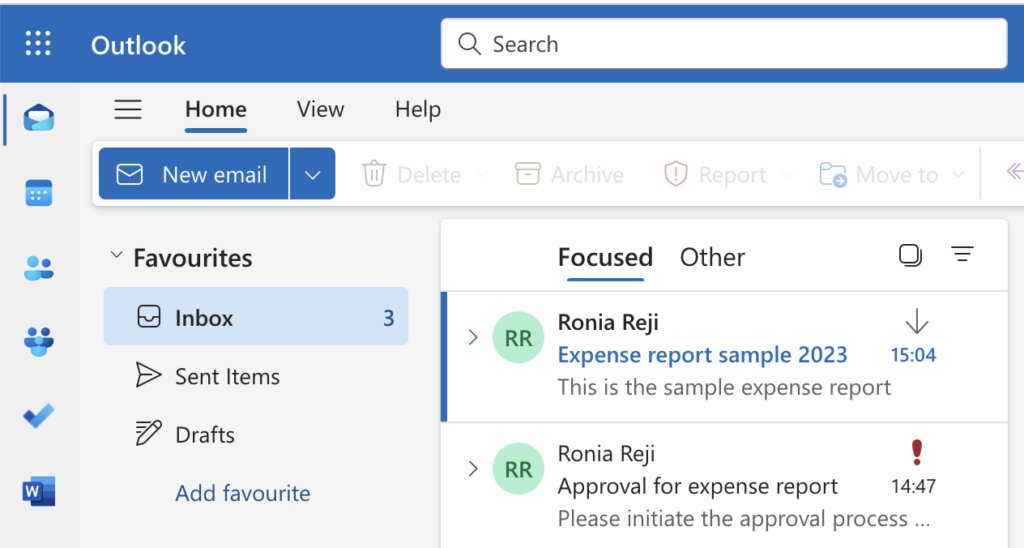
The High Importance feature in Outlook is a super useful email management feature for sending urgent messages. When a sender marks an email as High Importance, the email will have a bright red exclamation mark next to it when it reaches the recipient’s inbox. This way, the email stands out amidst the noise and lets the recipient know the urgency of the message.
*Remember: The exclamation mark will be visible only if the recipient is using Outlook as their email client.
You Might Also Like: How to Encrypt Outlook Email
How Does the High Importance Feature Work?
Marking an email as High Importance is quite easy and takes just a few simple clicks. Here is a step-by-step guide on how to do it.
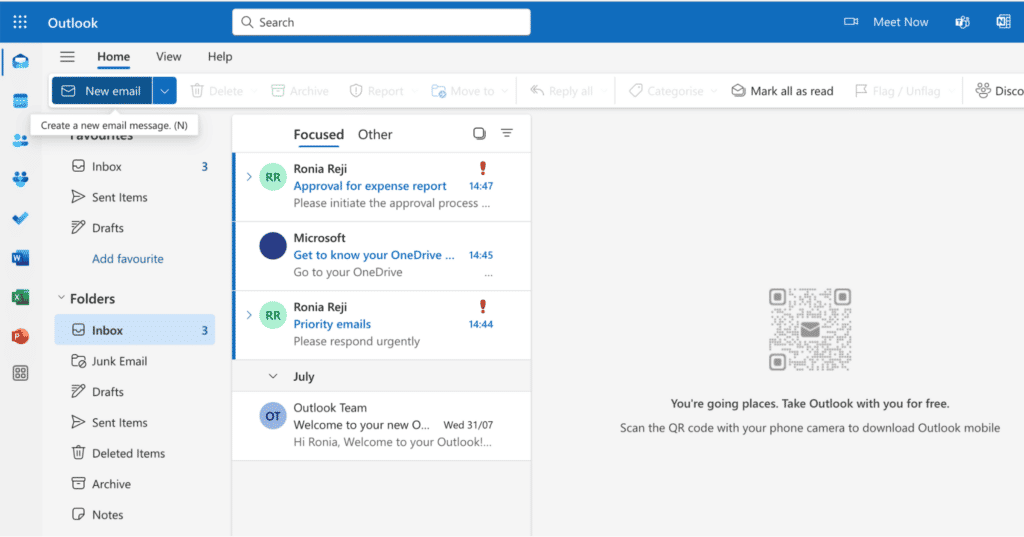
1. Open your Outlook inbox and choose ‘New Email’.
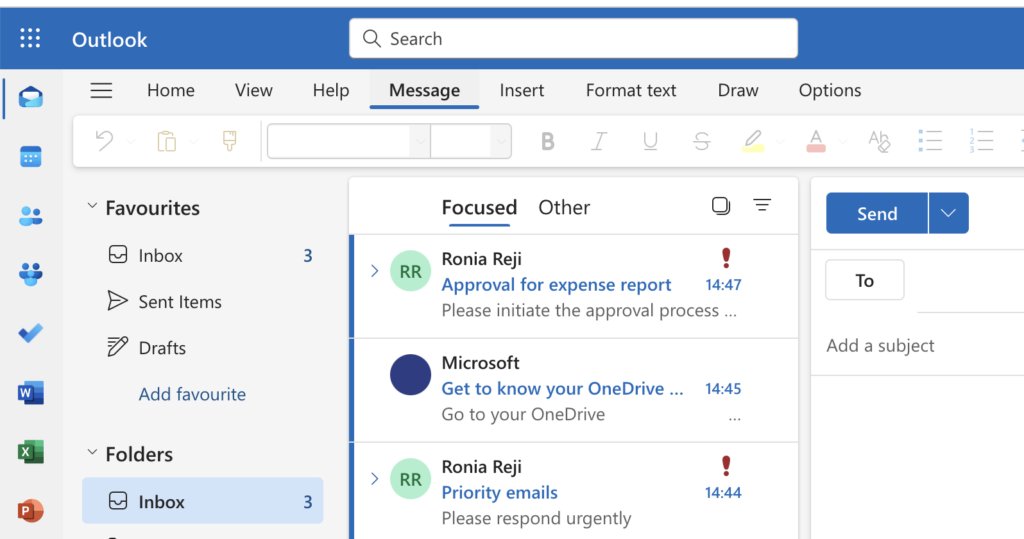
2. Then choose ‘Message’ from the list of options given in the Outlook ribbon.
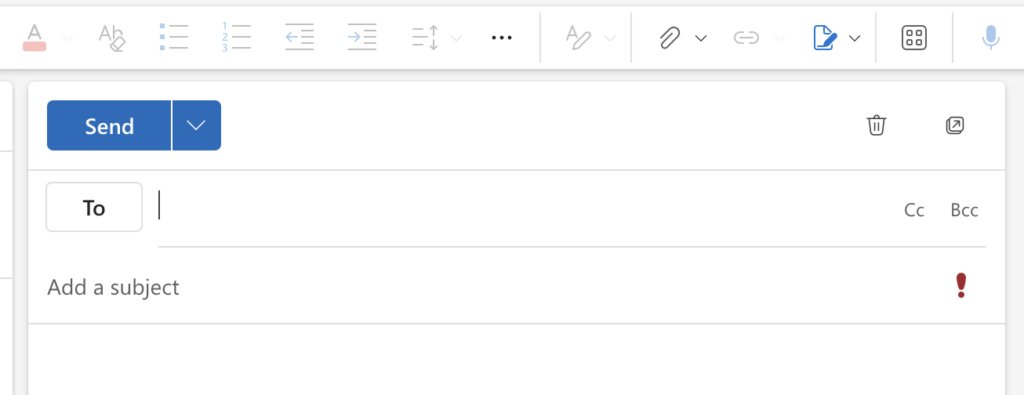
3. Under Message, you will see an exclamation mark icon with a red outline.

4. Click on the icon and an exclamation mark will appear next to your subject line. The email is now tagged as high importance and the same exclamation mark will be visible to the recipient of this particular email.
Now, just like High Importance, Outlook also offers you the option to tag an email as ‘Low Importance’. These can be applied to non-urgent updates or casual emails when the recipient is not required to respond immediately. To enable low importance:
1. Under ‘Message’ choose the icon represented by ↓ . You can find it right next to the icon for High Importance.

2. Once you click on the icon, a low priority icon will appear next to the subject line.

3. When the email is delivered, the recipient will be able to see that the message has been marked as being low priority.
When Should You Use the High Importance Feature in Outlook?
Here are some scenarios where you should be using the high importance feature.
- Time-sensitive information: Mark an email as high importance if it requires a response or a follow-up action within a specific time frame. This includes urgent meeting requests, customer complaints that require a quick resolution, approvals, or last minute changes to events or meetings.
- Critical business decisions: You can use the high importance feature whenever you send an email associated with important decisions that have a significant impact on your business operations. Some examples of such emails include vendor management contracts, budget allocation requests, or strategy approvals.
- Stakeholder communication: Another situation where high importance tags are useful is when you are in talks with third-party vendors or partners and you want to send them information that cannot be overlooked. This includes information like the statement of work, contracts and agreements, proposal documents, or payment requests.
Best Practices for Using High Importance in Outlook
Here are some tips to effectively use the high importance feature in Outlook.
For senders
- Be very selective: Don’t use the high importance tag for any email. Have a proper system in place to identify which emails merit the high importance tag and which messages do not need to be flagged. Overusing the high importance tag can sometimes result in recipients completely ignoring all your emails.
- Use clear communication: Make sure the subject line and message body reads crisp and conveys the urgency of your request in as much detail as possible. Explain why the request is urgent rather than relying only on the high importance marker.
For recipients
- Integrate into tasks: If you receive an email marked as high importance, flag the message so that it gets added to your task list. This way you won’t miss completing the action required for the email.
To do this:
1. Simply click the flag icon next to the message you want and it will turn red.
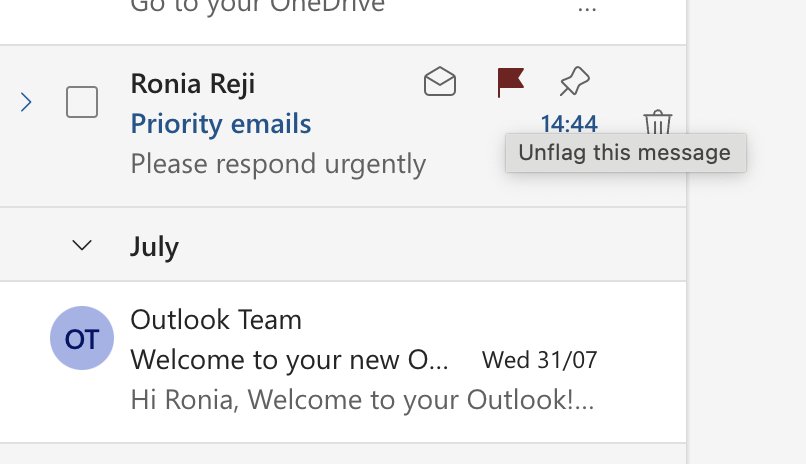
2. Now go to ‘To Do’ on the left panel of your inbox. Navigate to ‘Flagged Emails’ and you will see a task list with all your to-dos listed. You can add due dates for these tasks and set up reminders to get notified of an upcoming task deadline.

- Use automation: Define email categorization rules so that all high importance emails are routed to a specific folder when they arrive in your inbox. This way you can view important emails in a single location and respond to them on priority.
To set it up, you’ll first need to set up a rule to categorize your incoming emails in Outlook.
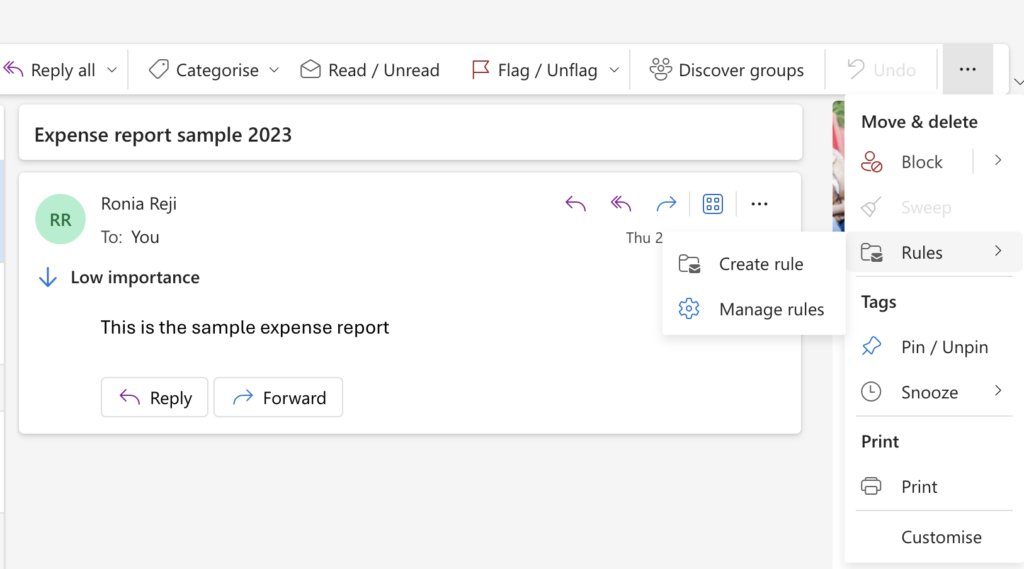
1. Click on the email you want to and navigate to the three dots located towards the right of the Outlook Ribbon. Choose ‘Rules’ from the drop down menu and choose ‘Create Rule’ from the options.
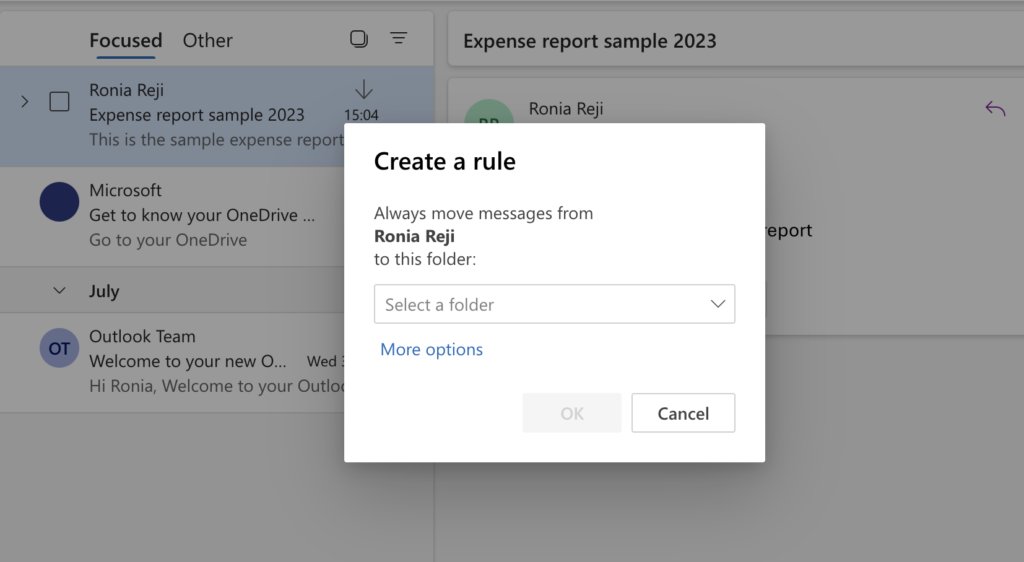
2. Choose ‘More options’ in the pop-up that opens.
3. Under ‘Add Condition’, navigate to ‘Marked With’ and choose ‘Importance’.
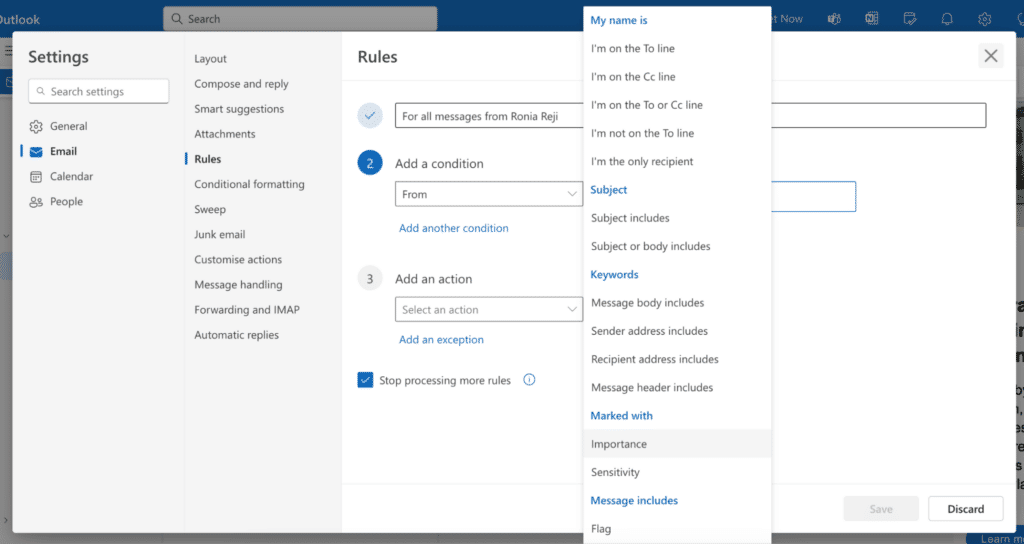
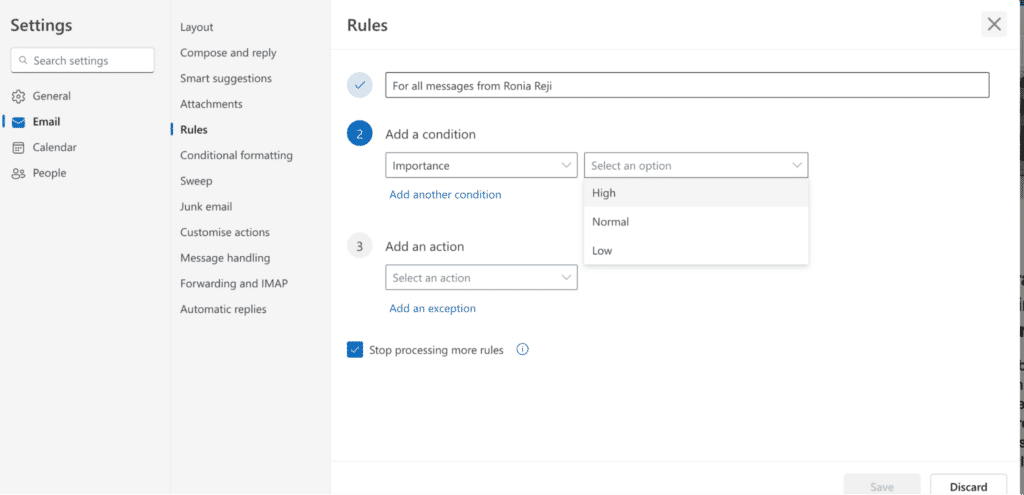
4. In the next field, choose ‘High’ from the drop down that appears.
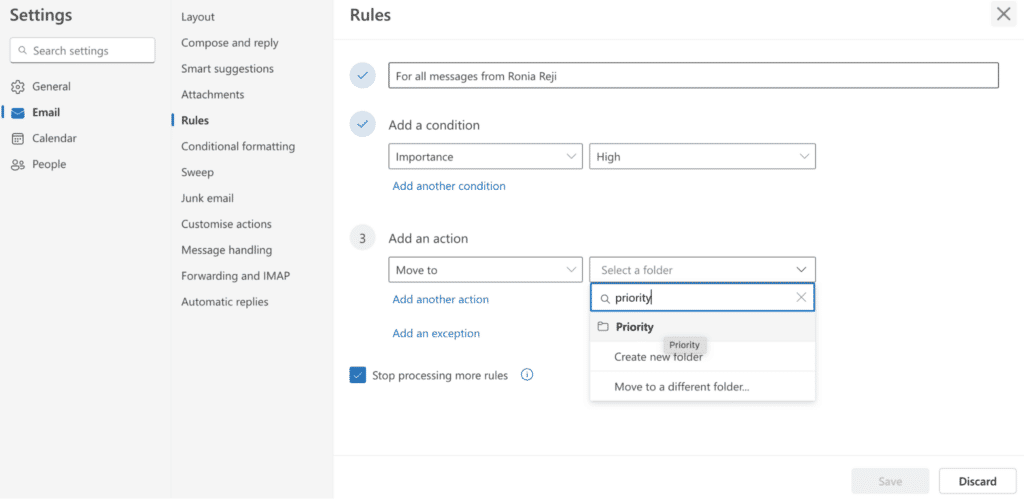
5. Then, under ‘Add an Action’ choose ‘Move to’, and then click on the folder you want to add the high importance emails to. In this case, we’ve chosen a folder named ‘Priority’.
5. Once you click ‘Save’, another window will open up. Click the play button next to the rule that you want to run.
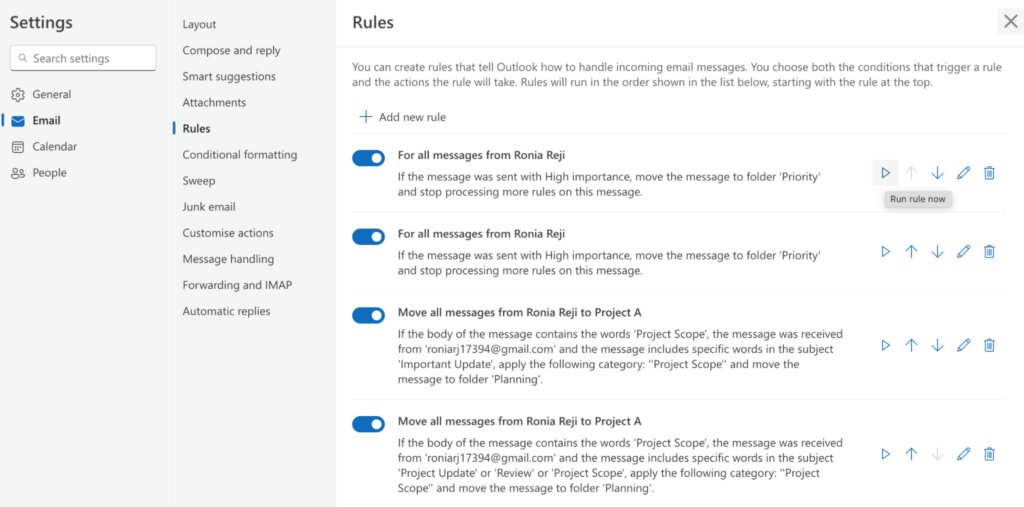
Now all high importance emails will be automatically routed to the folder named Priority, allowing you to view and respond to urgent emails from one place.
Maximize the Impact of Your Emails With Outlook’s High Importance Feature
The Outlook High Importance feature can be a very useful function, provided you use it thoughtfully.
It can help you prioritize your responses, offer quick follow-ups when necessary, and help you stay on top of deadlines, urgent tasks, and critical information. However, remember to use it very judiciously as overusing it can minimize its impact.
If you’re looking for a more advanced way to manage your inbox, we encourage you to try out Hiver – a powerful email management tool that operates right out of your inbox. Sign up for a free 7 day trial to learn more.


