Email Tracking in Outlook: A Complete Guide
Table of contents
Have you ever wondered whether your important emails are being read or just sitting unopened in someone’s inbox? Email tracking is essential because it helps you:
- Know for sure that your email has reached the recipient’s inbox.
- See if and when your email was opened, so you can follow up appropriately.
- Understand your email’s impact and adjust your messaging for better responses.
Outlook has a built-in email tracking feature that allows you to request delivery and read receipts, giving you valuable insights into your email communications. It’s a handy tool for anyone who wants to stay on top of their sent messages.
In this blog, we’ll discuss Outlook’s email tracking feature—how it works, how to set it up, and how it can help you manage your emails more effectively. Let’s get started!
Table of Contents
- What is Email Tracking in Outlook?
- Step-by-Step Ways for Email Tracking in Outlook
- Importance of Email Tracking in Outlook
- How Hiver’s Email Tracking Works in Outlook
- Best Practices for Email Tracking in Outlook
- Final Words
What is Email Tracking in Outlook?
Email tracking in Outlook refers to the features that allow you to monitor the status of the emails you send using Microsoft Outlook. Specifically, Outlook provides two main tracking options:
- Delivery Receipts: This feature notifies you when your email has been successfully delivered to the recipient’s email server. It confirms that the email has reached its destination but doesn’t guarantee that the recipient has seen it.
- Read Receipts: This option sends you a notification when the recipient opens your email. It confirms that your message has been opened, giving you insight into whether the recipient has likely read it.

Let’s say you’ve sent a contract proposal to a client using Outlook. By enabling email tracking, you request a read receipt. Once the client opens your email, you’ll receive a notification indicating that the message was read at a specific time.
This confirmation lets you know they’re reviewing your proposal, and you can plan your next steps accordingly—whether that’s preparing for a follow-up meeting or anticipating questions they might have.
Step-by-Step Ways for Email Tracking in Outlook
Whether you’re following up on a sales lead or managing a project, email tracking helps you stay informed and follow up at just the right time. Here’s a step-by-step guide on tracking emails on Outlook:

- Open Outlook: Launch Outlook on your computer, and make sure you’re logged in to the correct email account.
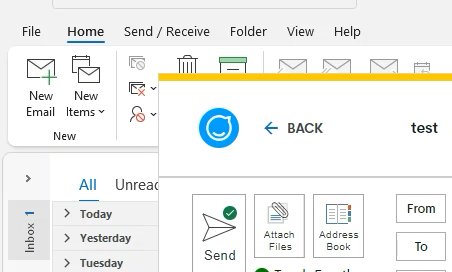
- Create a New Email: Click on “New Email” at the top left to compose a message. Write your subject line, and body text, and add any necessary attachments as usual.
- Access Tracking Options: Before hitting send, navigate to the “Options” tab at the top of your email window. This is where you’ll find the tools to enable tracking.
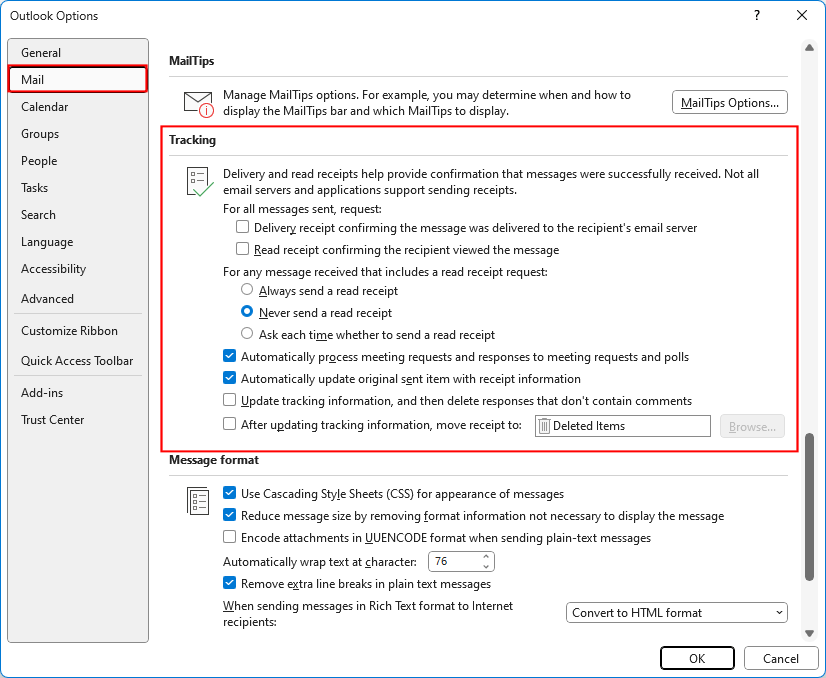
- Enable “Read Receipt” and “Delivery Receipt”: Under the “Options” tab, you’ll see checkboxes for “Request a Read Receipt” and “Request a Delivery Receipt”:
- Delivery Receipt: Confirms that the email was successfully delivered to the recipient’s server.
- Read Receipt: Notifies you when the recipient opens the email. Simply check one or both of these boxes to enable tracking for your email.
- Send Your Email: Once you’ve enabled the tracking options, click “Send.” Outlook will now monitor the status of the email you’ve sent.
- View Tracking Information: After sending the email, tracking notifications will start coming in. For delivery receipts, you’ll get a confirmation in your inbox that your email was successfully delivered. For read receipts, you’ll be notified when the recipient opens the email. Keep in mind that the recipient has the option to decline sending a read receipt, so you may not always receive one.
Importance of Email Tracking in Outlook
Knowing when your emails have been received and read can help you be productive. Some of the reasons why Outlook email tracking matters are:
- Optimized follow-up timing: Knowing when your emails are opened enables you to schedule follow-ups with precision.
- Increased engagement: Email insights allow you to customize your content for more effective audience interaction.
- Streamlined customer support: Track email interactions to improve response times and provide more personalized assistance.
- Effective project management: Use email insights to coordinate with team members and stakeholders, ensuring everyone is aligned and informed throughout the project lifecycle.
- Performance metrics:Monitor and analyze the success of your email campaigns to refine your sales strategy.
How Hiver’s Email Tracking Works in Outlook
Hiver adds an extra layer to email tracking in Outlook by turning your inbox into a collaborative platform for teams. If you’ve ever wished for more control and clarity over your email communications, Hiver is the answer.
With Hiver’s excellent tracking features, you can perfectly monitor you can perfectly monitor status of emails, assign tasks, and add internal notes – all within Outlook.
Shared inboxes
One of Hiver’s standout features is the shared inbox functionality. It allows teams to manage emails together without the mess of forwarding or CC-ing. Imagine your entire support or sales team having access to a single inbox, where everyone can see which emails are being handled and which still need attention.
It’s perfect for team collaboration—multiple people can view and act on emails without any dependency. This is particularly useful for customer support or sales teams that rely on smooth coordination to provide excellent service.
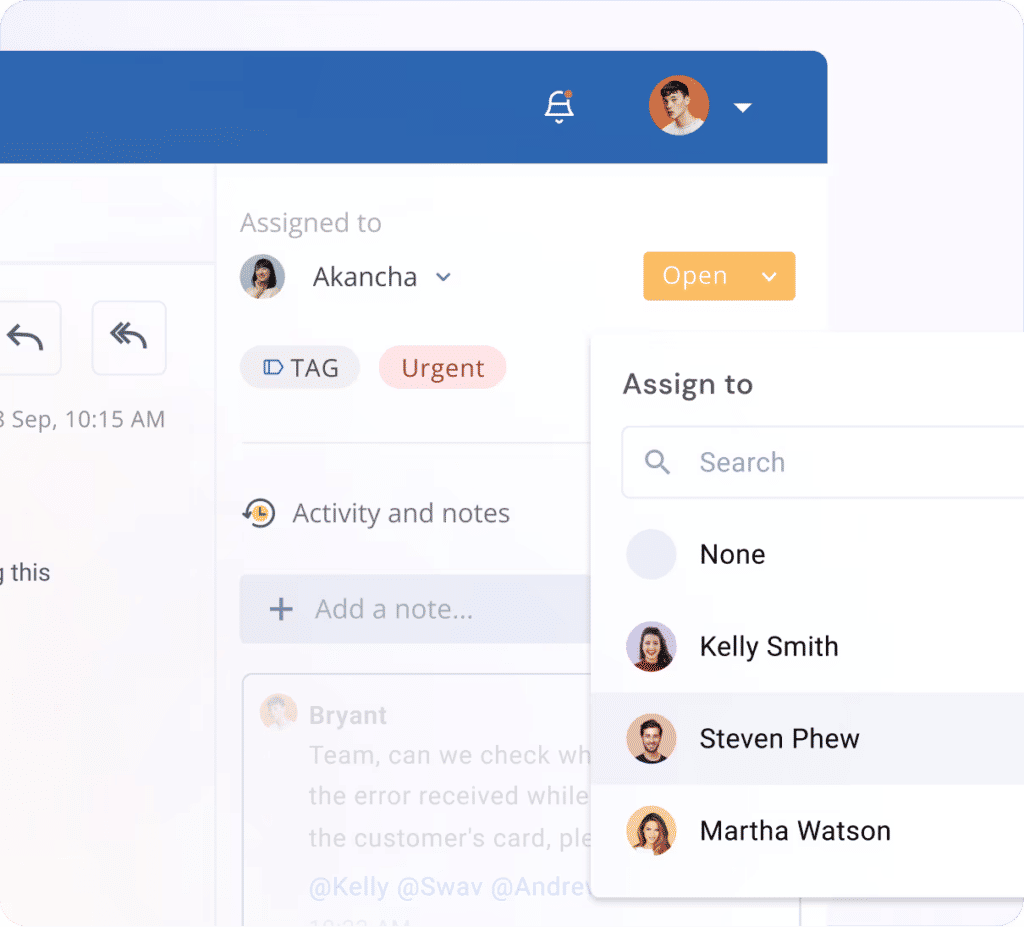
For example, when a customer shoots an email about a product bug, it goes into the ‘Unassigned’ section. Your team lead can assign it to a support staff from here, track its status and ensure the query is resolved on time. There’s hardly any back and forth on who should take care of what email – Hiver keeps everything visible and streamlined.
Task assignment
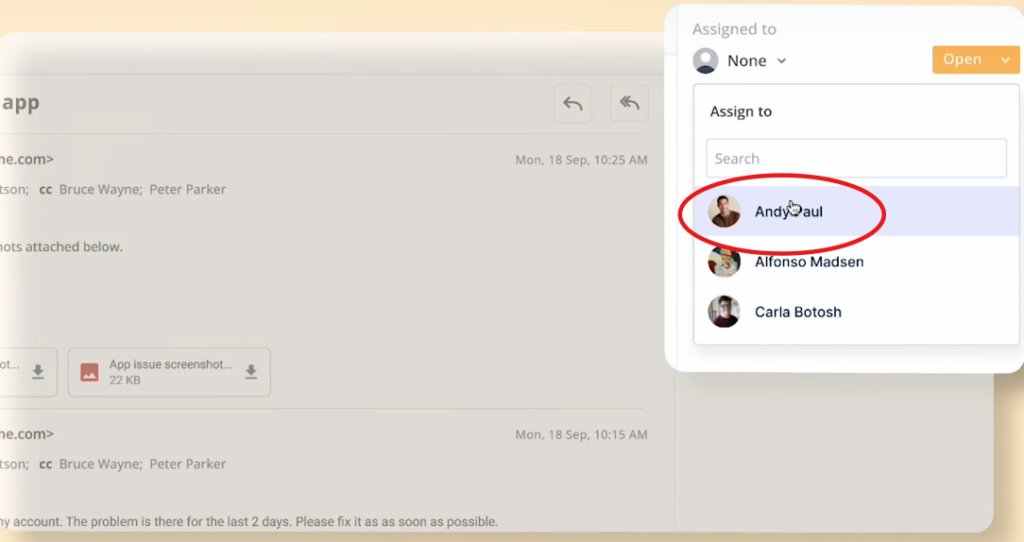
Beyond email tracking, Hiver adds task assignment capabilities to your inbox. You can assign emails as tasks to specific team members directly from Outlook. This encourages accountability, as everyone knows exactly who’s responsible for which emails.

Let’s say you receive an important email from a client. Using Hiver, you can quickly assign that email to the right team member with just a few clicks. The assignee gets notified, and you can easily track progress until the task is marked complete. It’s an effortless way to keep things organized without needing a separate project management tool.
Email notes
Ever wish you could give a colleague some context about an email without actually emailing them about it? That’s where email notes come in handy. With Hiver, you can leave private notes on any email, visible only to your team. This feature lets you add context, instructions, or important details about a conversation—without cluttering up the recipient’s inbox. It’s like having a chat window right inside your email thread!

For example, if you’re handling a customer query but need help from a colleague, you can leave a note like, “Hey, can you check on the status of this request?” They’ll see the note and can respond directly within the email thread, keeping communication clear and centralized.
No more switching between emails and messaging apps—Hiver keeps it all in one place.
Best Practices for Email Tracking in Outlook
Using email tracking features in Outlook can greatly improve your email communication. However, it’s important to use it thoughtfully to respect privacy and maintain professionalism. Here are some best practices to consider when using email tracking in Outlook:
1. Use Tracking Judiciously
- Reserve for important emails: Only request read or delivery receipts for messages where confirmation is crucial, such as legal documents, proposals, or critical project updates.
- Avoid overuse: Refrain from requesting receipts for every email, as it can overwhelm recipients and may be perceived as intrusive.
2. Be Transparent with Recipients
- Inform when appropriate: If you frequently require confirmations, consider informing your recipients that you will be requesting read receipts, so they are not caught off guard.
- Respect privacy: Understand that recipients have the option to decline sending a read receipt, and respect their choice without pressing for confirmation.
3. Keep Your Inbox Organized
- Manage receipts: Set up rules or filters in Outlook to automatically sort delivery and read receipts into specific folders to keep your inbox organized.
- Review regularly: Periodically review your tracking receipts to assess the effectiveness of your communications and adjust your strategies as needed.
4. Customize Settings Thoughtfully
- Per-email basis: Enable receipt requests on a per-email basis rather than globally, to ensure you’re only tracking essential communications.
- Set clear expectations: If you decide to enable tracking for all emails, be aware of how this might affect your relationships with recipients.
5. Interpret Receipts Carefully
- Understand limitations: A delivery receipt only confirms that the email was delivered to the server, not necessarily to the recipient’s inbox.
- Read receipt limitations: A read receipt indicates that the email was opened, but it doesn’t guarantee that the content was read or understood.
- Non-responses: If you don’t receive a read receipt, don’t assume the email was ignored; the recipient may have declined the receipt, or their email client may not support it.
6. Follow Up Appropriately
- Timely follow-up: Use receipt information to time your follow-ups effectively, but avoid excessive messaging, which may come across as pushy.
- Alternative contacts: If you don’t receive confirmations on important emails, consider reaching out through another channel to ensure communication.
7. Maintain Professionalism
- Content matters: Ensure that the content of your emails remains professional and clear, regardless of tracking.
- Avoid misuse: Do not use tracking to monitor employees or colleagues in a way that could be considered invasive or unethical.
8. Explore Alternatives When Necessary
- Use read receipts sparingly: If read receipts are not effective or appropriate, consider using other methods to confirm receipt, such as requesting a reply or using collaboration tools.
- Third-party tools: If you need more advanced tracking features, choose reputable third-party add-ins, such as Yesware, Mailsuite, or SalesHandy, that comply with security and privacy standards.
Final Words
Email tracking in Outlook offers some remarkable benefits — knowing when your emails are opened, following up at the right time, and keeping communications on track.
Whether you’re in sales, customer support, or project management, it’s a simple yet powerful tool that keeps you in control and helps you stay ahead.
And if you’re looking to streamline email tracking and management in Outlook even further, try Hiver. It’s free for 7 days!


